Dorm Room Layout Ideas for Two Roommates: 3 Practical Patterns
Compare three dorm room layout ideas for two roommates. Fit two beds, desks, and storage while protecting access, fixed features, and school rules.
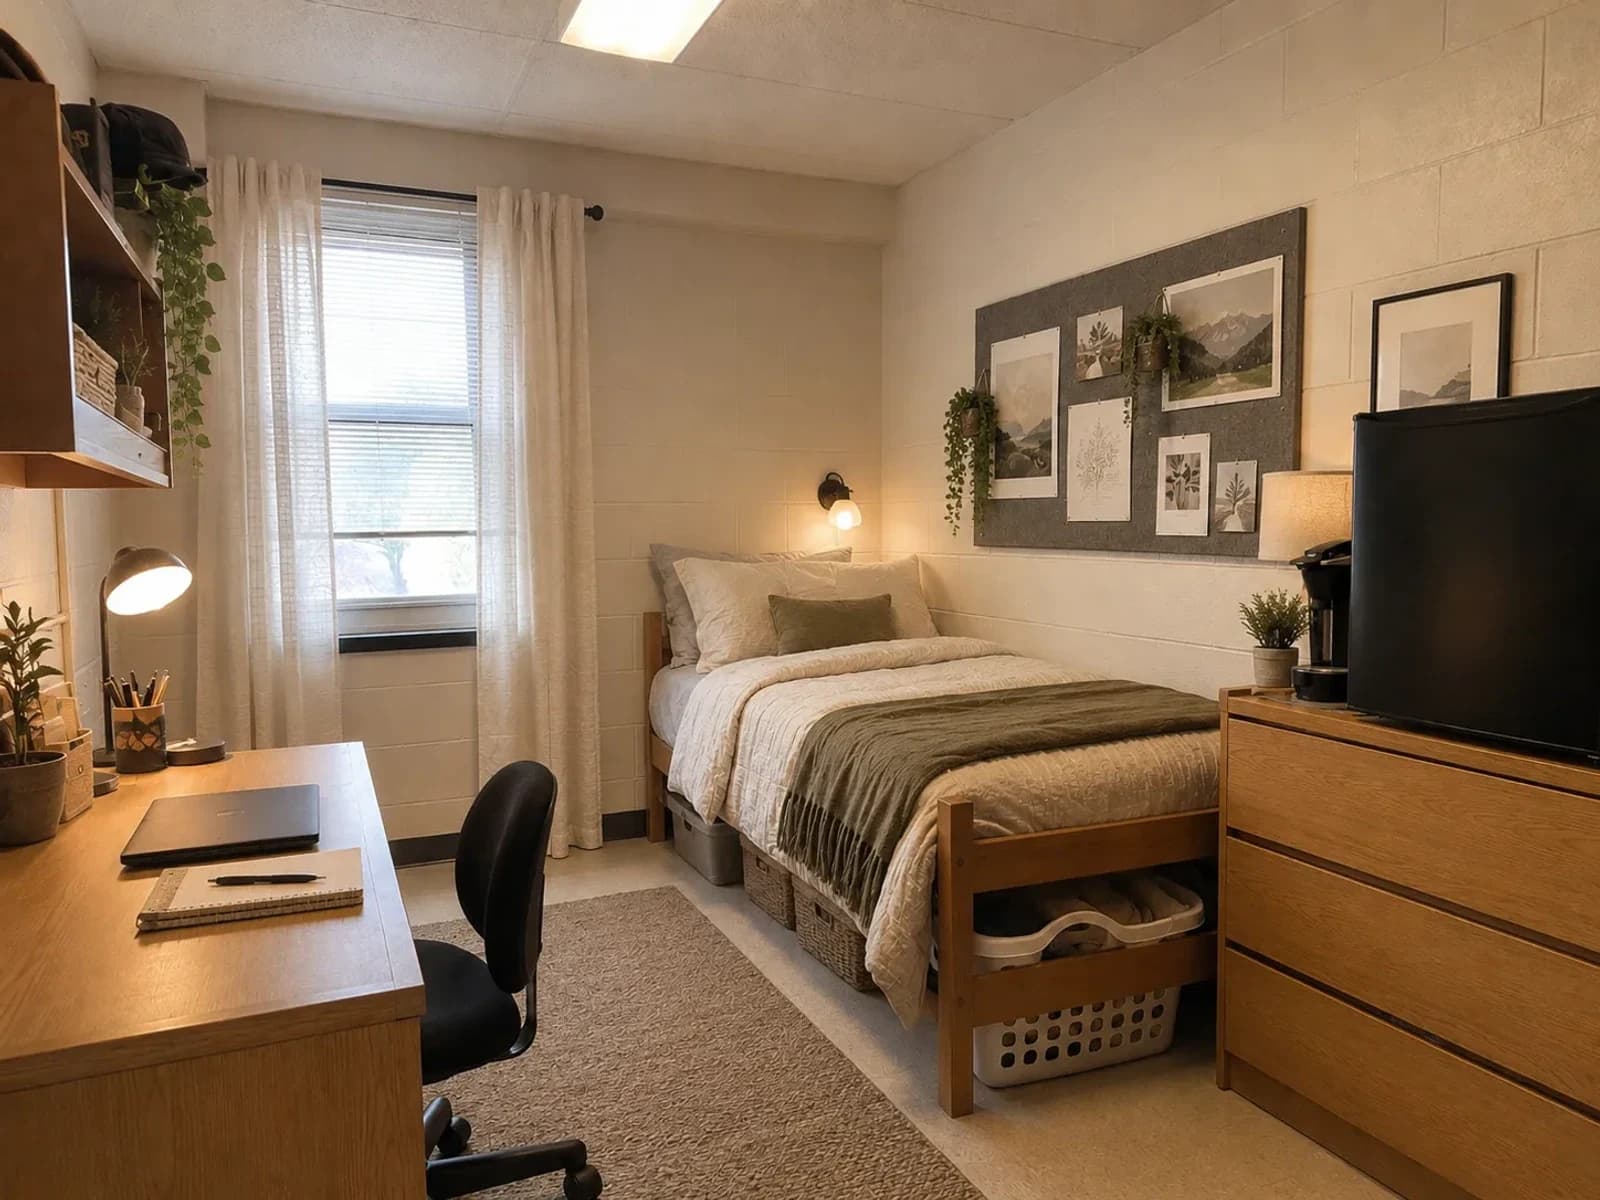
For most two-person dorm rooms, start with parallel beds on opposite walls, then place each desk where its chair can pull back without closing the center path. If doors, closets, windows, or HVAC make that arrangement fail, test an L-shaped plan or an approved lofted setup instead. Measure the actual room and supplied furniture, keep required access clear, and check current housing rules; the three diagrams below are planning patterns, not scaled plans.
For the broader decorating and purchase sequence, start with the modern dorm room ideas guide. This page focuses specifically on furniture placement and circulation.
Dorm Room Layout Constraints to Check First
| Constraint | Check with the room in use | Reject the layout if |
|---|---|---|
| Exit and door | Open the room door fully; walk from each bed to the exit | Furniture narrows or crosses the required route |
| Window and HVAC | Operate the window and blinds; locate vents, radiator, and access panels | A bed, desk, curtain, or storage piece blocks required access or airflow |
| Two study zones | Pull both desk chairs back and sit at each desk at the same time | One chair traps the other person or closes the walking path |
| Storage openings | Open closets, drawers, refrigerator, and under-bed bins completely | One item must be moved before another can open |
| Approved bed setup | Confirm permitted bed height, loft or bunk hardware, ladder, and guardrails | The plan depends on unapproved risers, stacking, or construction |
| Roommate access | Reach each bed, desk, outlet, and assigned storage independently | Either roommate must cross the other's work or sleep zone every day |
What to Measure Before Moving Dorm Furniture
Record the usable wall length, room width, ceiling height, door width and swing, window width and sill height, HVAC or radiator footprint, closet opening, and outlet locations. Then measure the full bed frame—not only the mattress—plus desks, chair pullback, dressers, wardrobes, refrigerator, and any movable shelf. Photograph labels or sketch each item so roommates are working from the same information.
Official room sheets are useful starting points, but buildings and individual rooms can vary. For example, Illinois State University's current Wright Hall double-room sheet shows two beds, desks, chairs, dressers, closets, a window/HVAC zone, and item dimensions. Treat your own school's current floor plan and the room itself as the authority rather than copying a layout from another residence hall.
See the Illinois State University Wright Hall double-room sheet for an example of the kind of verified furniture and room information to collect.
What Not to Block
- The room door, its full swing, and the required path from each bed to the exit
- A window that serves as egress or needs to open, plus its blinds and maintenance access
- HVAC units, radiators, vents, access panels, sprinklers, smoke detectors, and alarms
- Closet doors, dresser drawers, desk drawers, refrigerator doors, and chair pullback
- Outlets, approved power-strip access, and safe clearance around electrical equipment
- The usable study surface or the path needed for either roommate to reach it
Rules differ by school. The University of Michigan Housing packing guidance updated May 6, 2026 provides one current example of electrical, lighting, hanging, and roommate-coordination requirements; always use your residence hall's current policy.
Three Dorm Layout Patterns for Two Roommates
1. Parallel Beds With a Clear Center Aisle
Place one bed along each long wall and keep the middle open. This gives roommates comparable sleep zones and makes ownership easy to understand. Desks can sit near the window when they do not block HVAC or egress, or at the foot of each bed when chair clearance works. Put each person's storage beside or under their bed. This pattern is usually the simplest to reset and the easiest for both students to navigate independently.
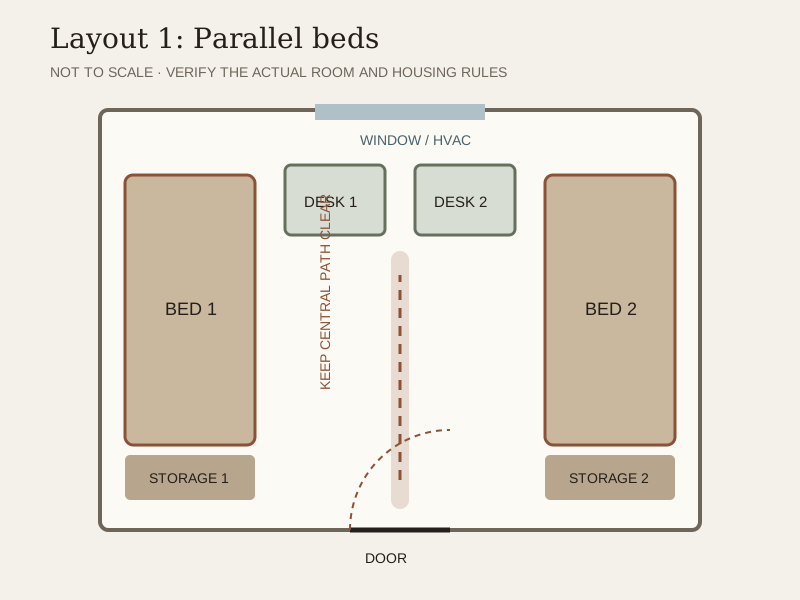
2. L-Shaped Beds With a Shared Open Zone
An L-shaped sleep zone can free one part of the room for shared movement or a small rug, especially when the door or closet makes perfect symmetry impossible. It works best when the two bed ends meet without trapping one roommate or blocking drawers. Keep desks on a separate wall so chair movement does not spill into the sleep zone. Discuss privacy and access first: an efficient plan is not fair if one person must cross the other's space every day.
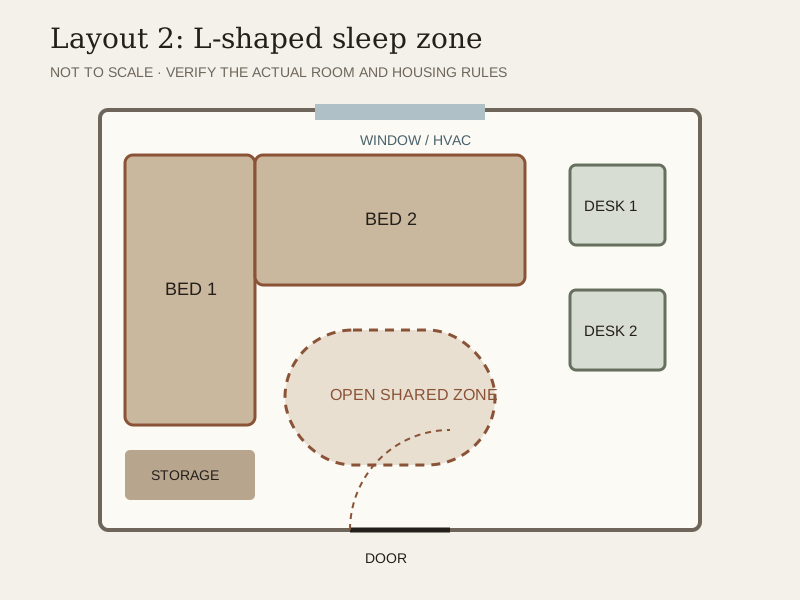
3. Approved Lofted Beds With Desks Below
Lofting can consolidate each person's bed, desk, and storage into one vertical zone, leaving the center clearer. Use this only when the school supplies or expressly approves the system and configuration. Confirm guardrails, ladder access, ceiling and fixture clearance, furniture placement below, and whether beds may be lofted beside windows or sprinklers. Do not improvise with household lumber, stacked furniture, or unapproved risers.
How to Make Any Dorm Layout Work Better
Compare the Three Patterns Before You Move Anything
Choose parallel beds when equal personal zones and a direct center aisle matter most. Consider an L-shaped arrangement when a closet, door, or fixed feature breaks the room's symmetry and one open shared zone would be more useful than two matching sides. Consider approved lofts only when vertical separation solves a real floor-space problem and both roommates are comfortable using the permitted setup. None of the patterns wins by default: score each one against the same questions—can both people reach the exit, open storage, use a desk, access an outlet, and get into bed without crossing the other's working zone?
Give Each Desk Its Own Chair Zone
A desk may technically fit while its chair makes the room unusable. Test the chair pulled back, a person seated, and another person walking behind. Avoid facing two chairs into the same narrow strip. If desks share a wall, leave enough room for both students to sit and stand independently. Keep the laptop area clear and place vertical files or supplies where they do not reduce the working surface.
Use Under-Bed Storage Before Adding Furniture
Measure the actual clearance and use containers that can slide out without moving the desk chair or another bin. Store seasonal and occasional items deeper; keep daily clothing and linens easier to reach. If the school allows height adjustment, use only the approved bed positions or equipment. A second bookcase or cart should come after the built-in dresser, closet, desk drawers, and under-bed zone have been assigned.
Assign Equal Usable Zones, Not Identical Shapes
One roommate may have a longer wall while the other has easier closet access. Balance usefulness rather than forcing symmetry: comparable under-bed volume, a clear study surface, reachable outlets, and personal wall or pinboard space. Agree on who uses each dresser, closet section, shelf, and shared appliance zone before unpacking. Label temporary zones during move-in so belongings do not create the layout by accident.
Place Shared Appliances and Storage Deliberately
Use only permitted appliances and place them where doors can open, cords reach approved outlets without crossing a path, and ventilation or manufacturer clearances remain available. Group shared food or cleaning storage nearby instead of scattering it between both desks. Do not stack equipment or add shelves above it unless the school and product instructions allow that setup.
Test the Layout Before Buying Optional Pieces
Use painter's tape only if the housing policy permits it, or lay paper on the floor to mark a proposed rug, ottoman, cart, or chair. Open every drawer and door, pull both desk chairs back, and walk from each bed to the exit. Live with the core layout before adding lounge seating. In a small double, empty floor and easy movement are useful features—not unfinished space waiting to be filled.
A Move-In-Day Layout Sequence
Start by comparing the actual room with the school's diagram. Note any column, pipe chase, outlet, damaged fixture, or furniture difference before unpacking. Photograph the empty room and supplied items according to housing rules. Confirm which pieces are movable and which bed settings are permitted. If something conflicts with the published information, ask housing staff before forcing the plan.
- Place the beds first while protecting the door, window, HVAC, and route to the exit
- Position desks and pull both chairs back to test simultaneous use
- Open closets, drawers, refrigerator doors, and storage containers completely
- Assign one closet, dresser, desk, and under-bed zone to each roommate
- Route approved power access without crossing a walking path or pinching a cord
- Add bedding and daily essentials, then wait before bringing in optional furniture
Walk the finished route while carrying a laundry basket or backpack, because a path that works empty may fail during daily use. Sit at both desks, climb into both beds, reach the closet, and check sightlines to shared storage. Revisit the arrangement after the first week: changing a desk angle or moving a bin is easier than living around a recurring collision for a semester.
Plan the Room With Your Roommate
Share measurements and the three candidate patterns before move-in, but avoid treating a sketch as a promise. Agree on priorities such as equal desk access, morning routines, sleep preferences, accessibility needs, and who brings permitted shared items. Decide what can wait until both people see the room. If one setup gives a roommate less usable storage or a harder route, name that tradeoff and rebalance another zone instead of assuming visual symmetry makes the plan fair.
Keep a simple record of the final zones and shared purchases. A labeled phone photo can prevent duplicate organizers and make it easier to reset the room after cleaning. The goal is not to optimize every inch; it is to make daily actions predictable without turning shared floor space into overflow storage.
A Verified Real-Room Example
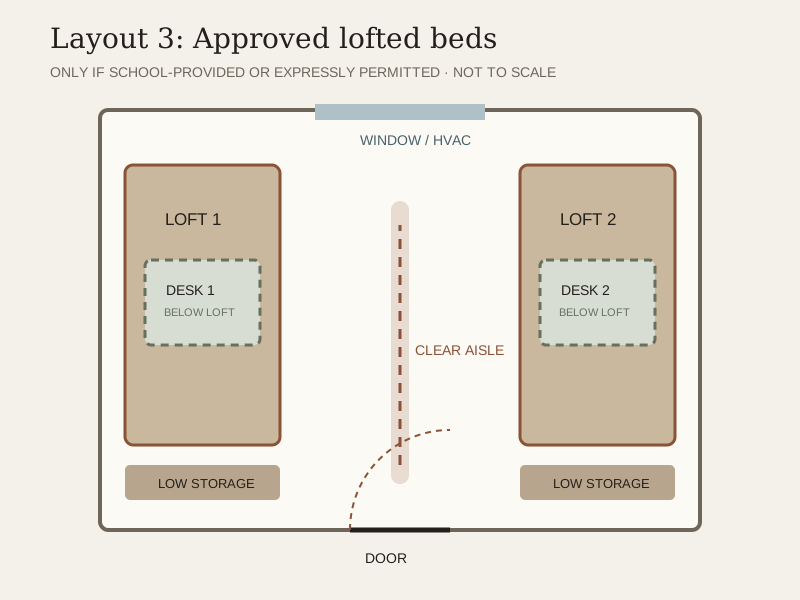
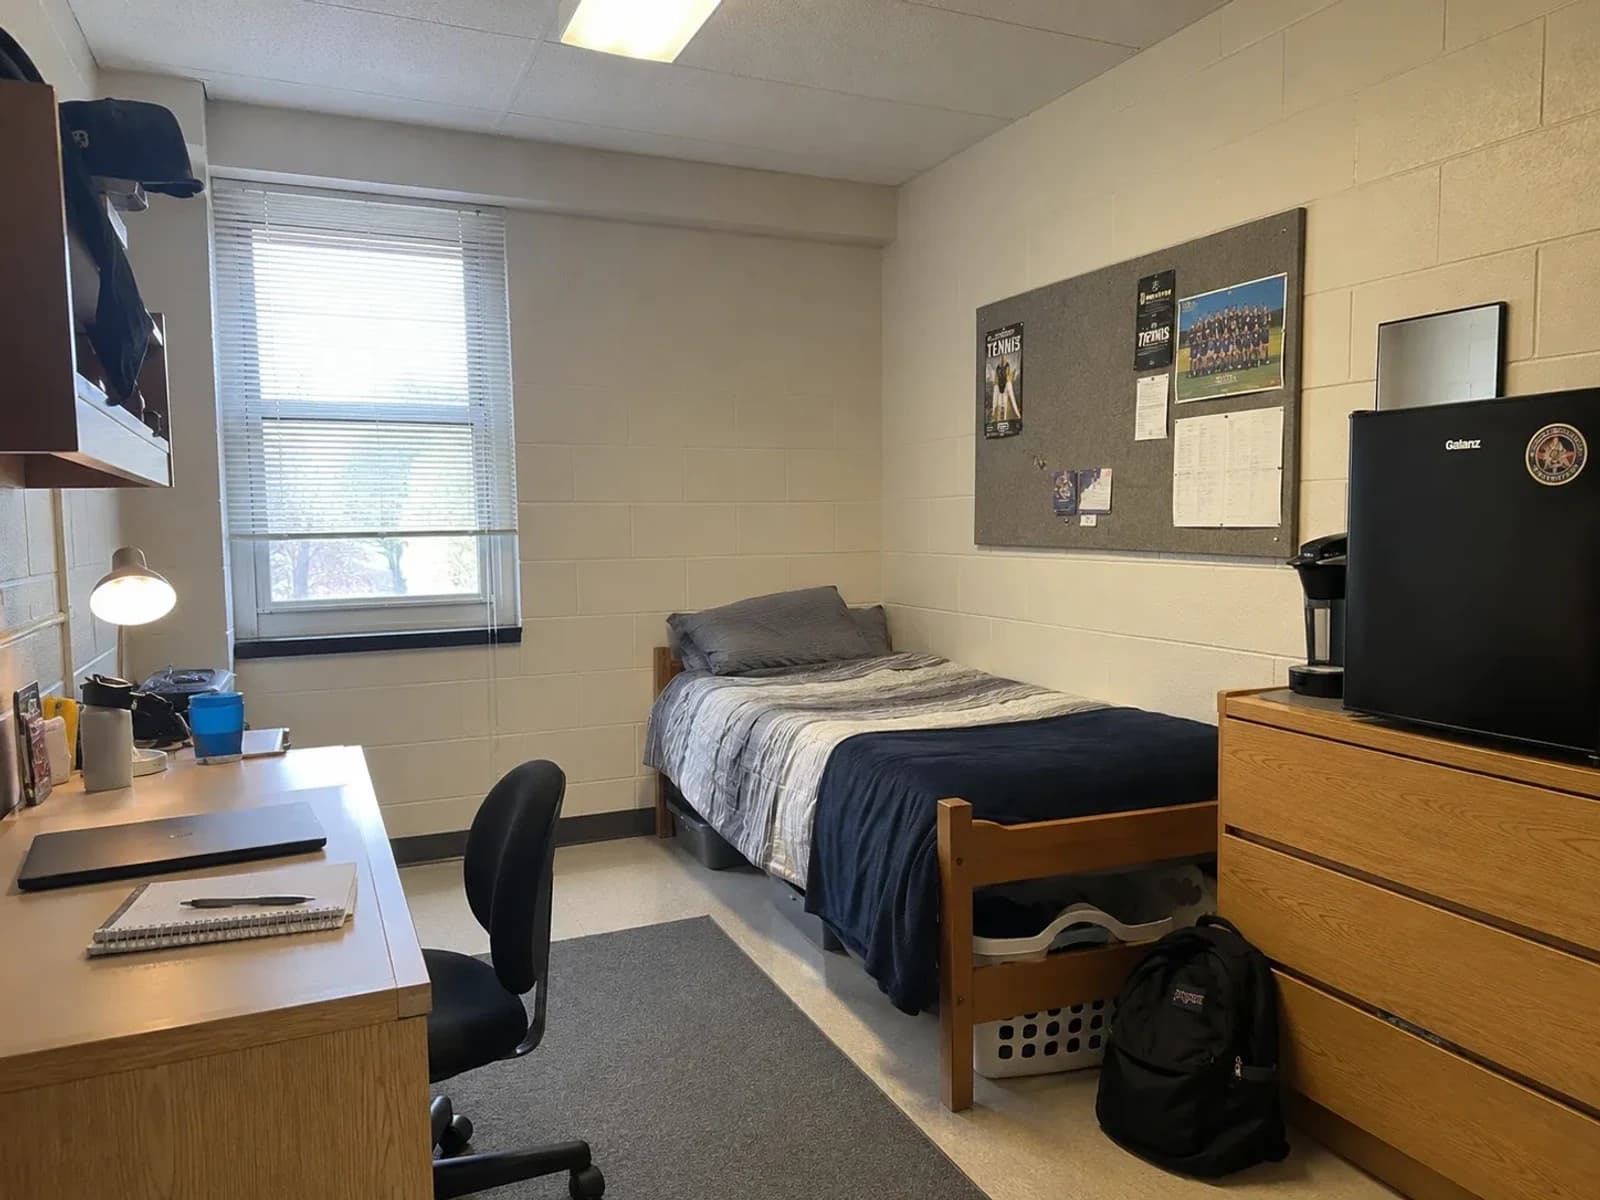
This Room Foundry preview begins with a real single-occupancy dorm photo. It does not claim to solve a two-person floor plan or provide measurements; it demonstrates how a preview can preserve the recognizable room while testing a more organized direction around the existing furniture.
 beforeafter
Stayed: the walls, ceiling, window, floor, bed location, desk, dresser, refrigerator, appliance zone, and circulation. Changed: bedding, storage presentation, lighting mood, art, and surface organization. Still verify: every physical measurement, safe access, school policy, material, and visually similar product before moving or buying anything.
Use the exact colors in the dorm room color schemes guide after the furniture plan and circulation work.
Final Thoughts
A strong dorm layout gives both roommates a reachable bed, a usable desk, defined storage, and a clear route through the room. Start with fixed features and supplied furniture, choose the simplest arrangement that preserves access, and treat lofting or extra pieces as optional. A diagram or preview can narrow the plan, but the real room, current housing policy, and physical clearances make the final decision.
Dorm room planner
Turn a saved idea into a plan for your real dorm.
Start with the full dorm guide, then compare color, layout, shopping order, and style before committing to exact products. Check your hall rules and real measurements first.
FAQ
Common questions
- What is the best layout for a two-person dorm room?
- Parallel beds on opposite walls are the most broadly useful starting point because they create equal personal zones and a direct center path. The best final arrangement still depends on the real room dimensions, door and window positions, supplied furniture, accessibility needs, and housing rules.
- How do you arrange a small dorm room with two beds and two desks?
- Place the beds first around a clear route to the door, then position each desk with its chair pulled back. Open every closet, drawer, and appliance door, assign storage to each roommate, and reject any arrangement that blocks a window, HVAC unit, outlet, detector, or required access.
- Should dorm desks go under the window?
- Only when the desks fit without blocking the window, HVAC unit, radiator, outlet access, or required clearance. Daylight can help a study zone, but safety, egress, and maintenance access come first.
- Can students loft or bunk dorm beds?
- Policies vary. Use only school-provided or expressly approved lofting and bunking systems, follow the required setup, and do not improvise with unapproved risers, hardware, stacked furniture, or household lumber.
- How much walking space should a dorm room layout leave?
- There is no universal clearance that applies to every dorm. Use your residence hall's current accessibility, egress, furniture, and safety requirements, then test the actual route with desk chairs pulled back and storage doors open. Keep the door swing, required exit path, windows used for egress, and maintenance access clear.
Keep exploring
Related reading
Try Room Foundry
See a clearer direction for your dorm room.
Upload one room photo and preview a more organized bedroom direction around the furniture and fixed features you actually have.
Preview your dorm room free