AI Bedroom Design From a Photo: A Practical Step-by-Step Guide
Turn a bedroom photo into a useful AI design concept with a clear keep list, practical prompt, focused refinements, and a measured shopping plan.
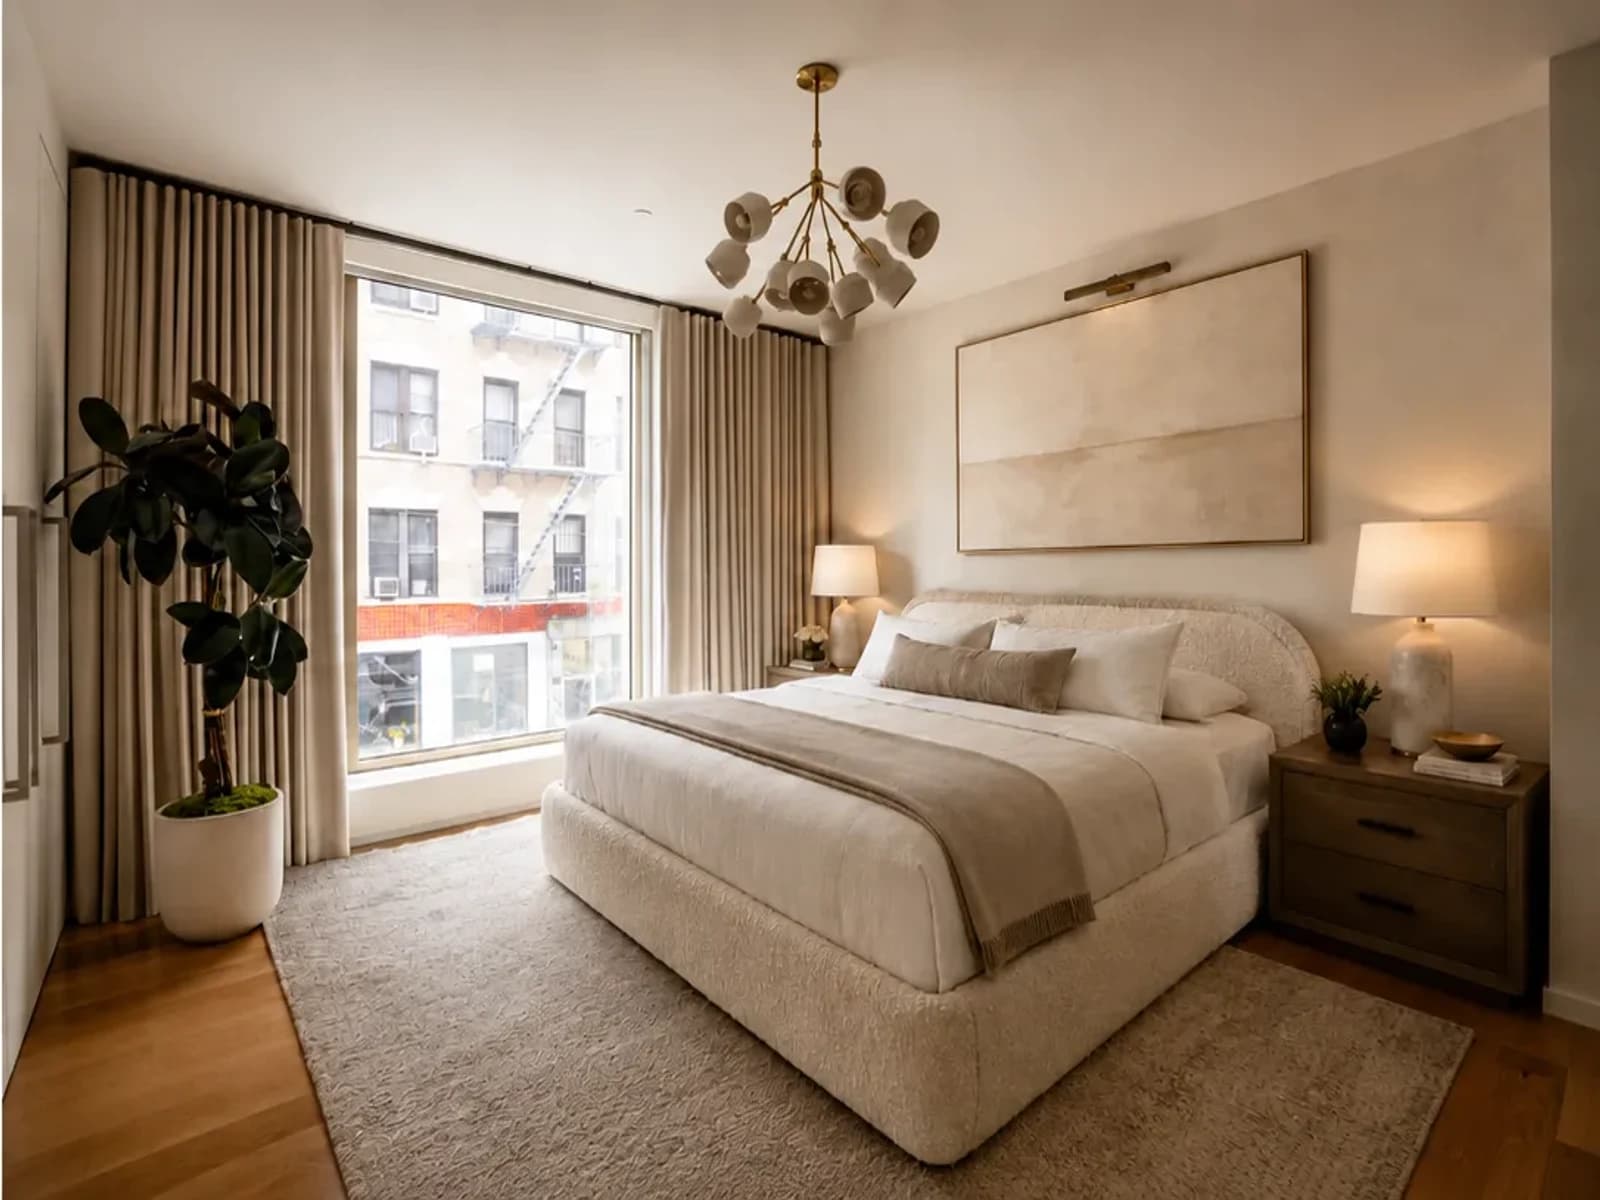
AI bedroom design from a photo is most useful when you treat it as a guided visual planning process. Upload one clear bedroom image, decide what must stay, choose one style direction, describe the changes you want, and compare each generated version with the real room. The goal is not a perfect final plan; it is a confident design direction you can measure, source, and verify.
Bedrooms benefit from a constraint-first workflow because the bed usually controls the view, circulation, rug placement, nightstands, lamps, and art. If the bed is staying, say so before generation. Then let the preview explore the surrounding layers instead of silently replacing the most important object in the room.
AI Bedroom Design at a Glance
| Stage | Your decision | Useful output | Reality check |
|---|---|---|---|
| Photo | Choose a clear, level view | Recognizable room context | A photo is not a measured survey |
| Keep list | Lock the bed and fixed features | A constrained redesign | Compare preservation with the source |
| Style | Choose one primary direction | Coherent palette and mood | Samples can look different in real light |
| Prompt | Name priorities and avoid items | A specific first concept | Instructions reduce drift; they do not eliminate it |
| Refine | Change one issue per version | Comparable alternatives | Discard versions that break constraints |
| Plan | Measure and source real products | A practical shortlist | Confirm fit, safety, delivery, and returns |
For the broader technology, capability, and limitation framework, read how AI interior design from a photo works. The steps below apply that framework specifically to a bedroom.
Step 1: Photograph the Bedroom for Context
Use a current, well-lit photograph taken near a doorway or corner. Keep the camera roughly level and include the bed, floor, bed wall, windows, door relationship, and as much circulation as practical. Open curtains enough to reveal the wall and window, but avoid blowing out the image with extreme daylight. Remove temporary clutter that you do not want the system to interpret as part of the design.
One image can establish a useful visual direction, but it cannot show every wall or hidden condition. If the project depends on a second wall, closet access, or a tight path beside the bed, take another reference photo for your own planning and measure those conditions separately. Do not infer exact size from perspective.
Step 2: Separate Fixed, Keep, and Flexible Elements
- Fixed: walls, windows, doors, ceiling, floor, radiators, vents, outlets, and built-ins.
- Keep: the exact bed, a dresser, a rug, existing lamps, meaningful art, or another object you have chosen to retain.
- Flexible: bedding, curtains, wall color, nightstands, lighting style, rug direction, art arrangement, and removable decor.
Write the non-negotiable items first. For a retained bed, name its frame, headboard, placement, scale, and orientation—not only the word bed. If the room is rented, move permanent finishes into the fixed category even if you dislike them. A useful preview works with the actual project boundary.
If preservation is the main challenge, use the deeper guide to redesign a room while keeping existing furniture before drafting the prompt.
Step 3: Choose One Bedroom Style Direction
Pick the nearest primary style, then translate it into visible choices. Warm modern might mean warm white, medium wood, tailored neutral curtains, soft olive, simplified art, and layered lamps. Japandi might mean lower contrast, natural texture, fewer objects, and quieter silhouettes. The concrete description is more useful than stacking warm modern, coastal, farmhouse, minimalist, and traditional into one request.
If you are considering a quieter natural direction, the Japandi style guide explains its palette, materials, furniture, lighting, and common mistakes.
Step 4: Write a Bedroom Prompt With Clear Hierarchy
Example: Redesign this bedroom in a calm warm-modern style. Keep the exact upholstered bed frame, headboard, size, position, window, flooring, chandelier, and room architecture unchanged. Update the bedding, curtains, nightstand styling, rug direction, lighting mood, and art. Prioritize warm white, medium walnut, quiet olive accents, full-length curtains, and fewer small objects. Avoid gray-on-gray color, structural changes, extra furniture, and moving the bed.
The prompt has an order: direction, keep constraints, allowed changes, priorities, and avoid list. That hierarchy makes it easier to audit the result. Measurements included in a prompt can provide context, but they do not turn the returned image into proof of fit.
Step 5: Audit the First Bedroom Preview
Check constraints before aesthetics. Compare the source and output side by side. Are the window, ceiling, floor, bed wall, and camera relationship recognizable? Is the exact bed still present? Are doors, vents, radiators, and walking paths plausible? If a non-negotiable feature changed, revise or reject the version before evaluating the styling.
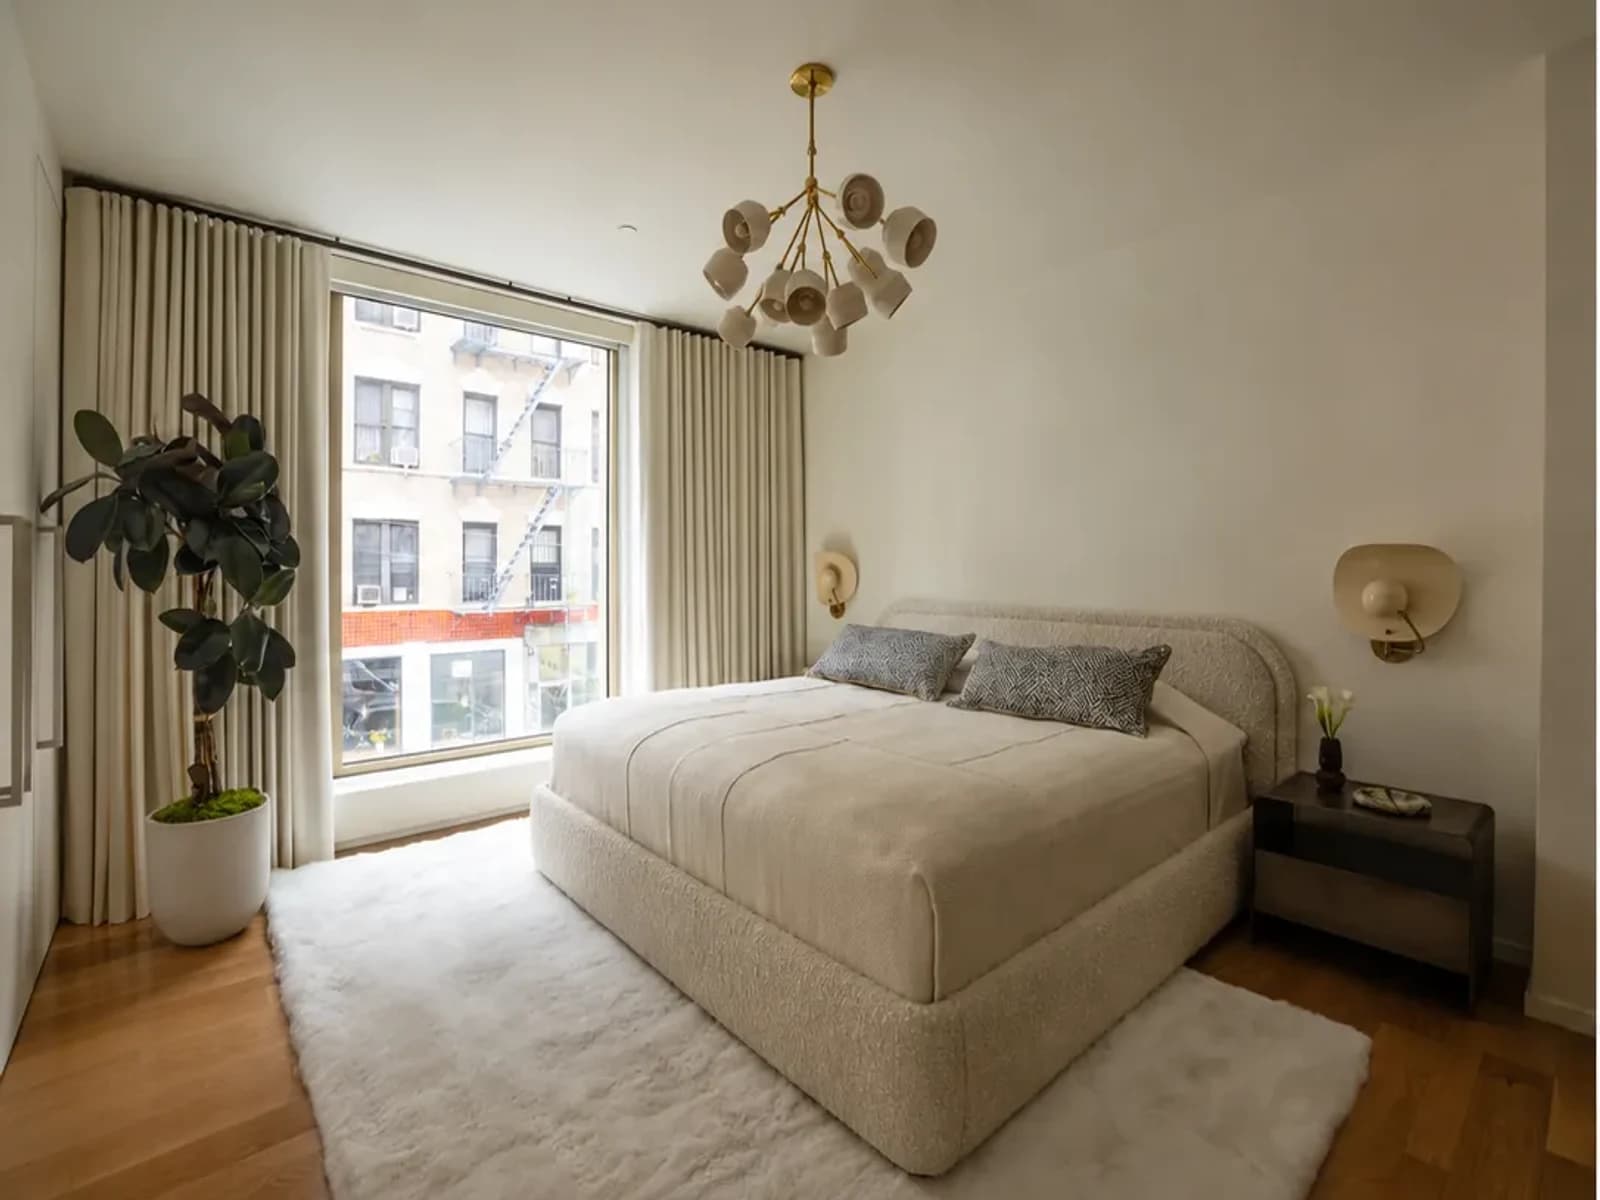 beforeafter
What stayed
The upholstered bed and curved headboard, large window, curtain wall, hardwood flooring, chandelier, plant, camera angle, and basic room shell remain recognizable. That continuity makes the preview useful as a redesign of this bedroom rather than an unrelated inspiration image.
What changed
The preview proposes fuller curtains, a larger grounded rug, layered neutral bedding, matching wood nightstands, warm lamps, simpler art, and a more finished warm-neutral palette. The changes clarify a direction while keeping the bed as the visual anchor.
What to verify
Measure rug coverage, nightstand width and height, bed clearances, window access, curtain mounting, outlet locations, and delivery paths. Confirm real materials and colors with samples. Verify any dresser or storage anchoring, electrical work, radiator or vent clearance, lease rules, and current product terms before purchasing or installing.
Step 6: Refine One Bedroom Decision at a Time
A first preview should start a comparison, not end it. Preserve the strongest version and change one high-impact issue. Focused instructions such as ‘add muted olive only to the lumbar pillow and throw’ or ‘remove small nightstand decor and reduce the pillow count’ produce versions you can actually compare. A request to change color, furniture, curtains, lighting, art, and layout at once creates a new concept instead of a controlled refinement.
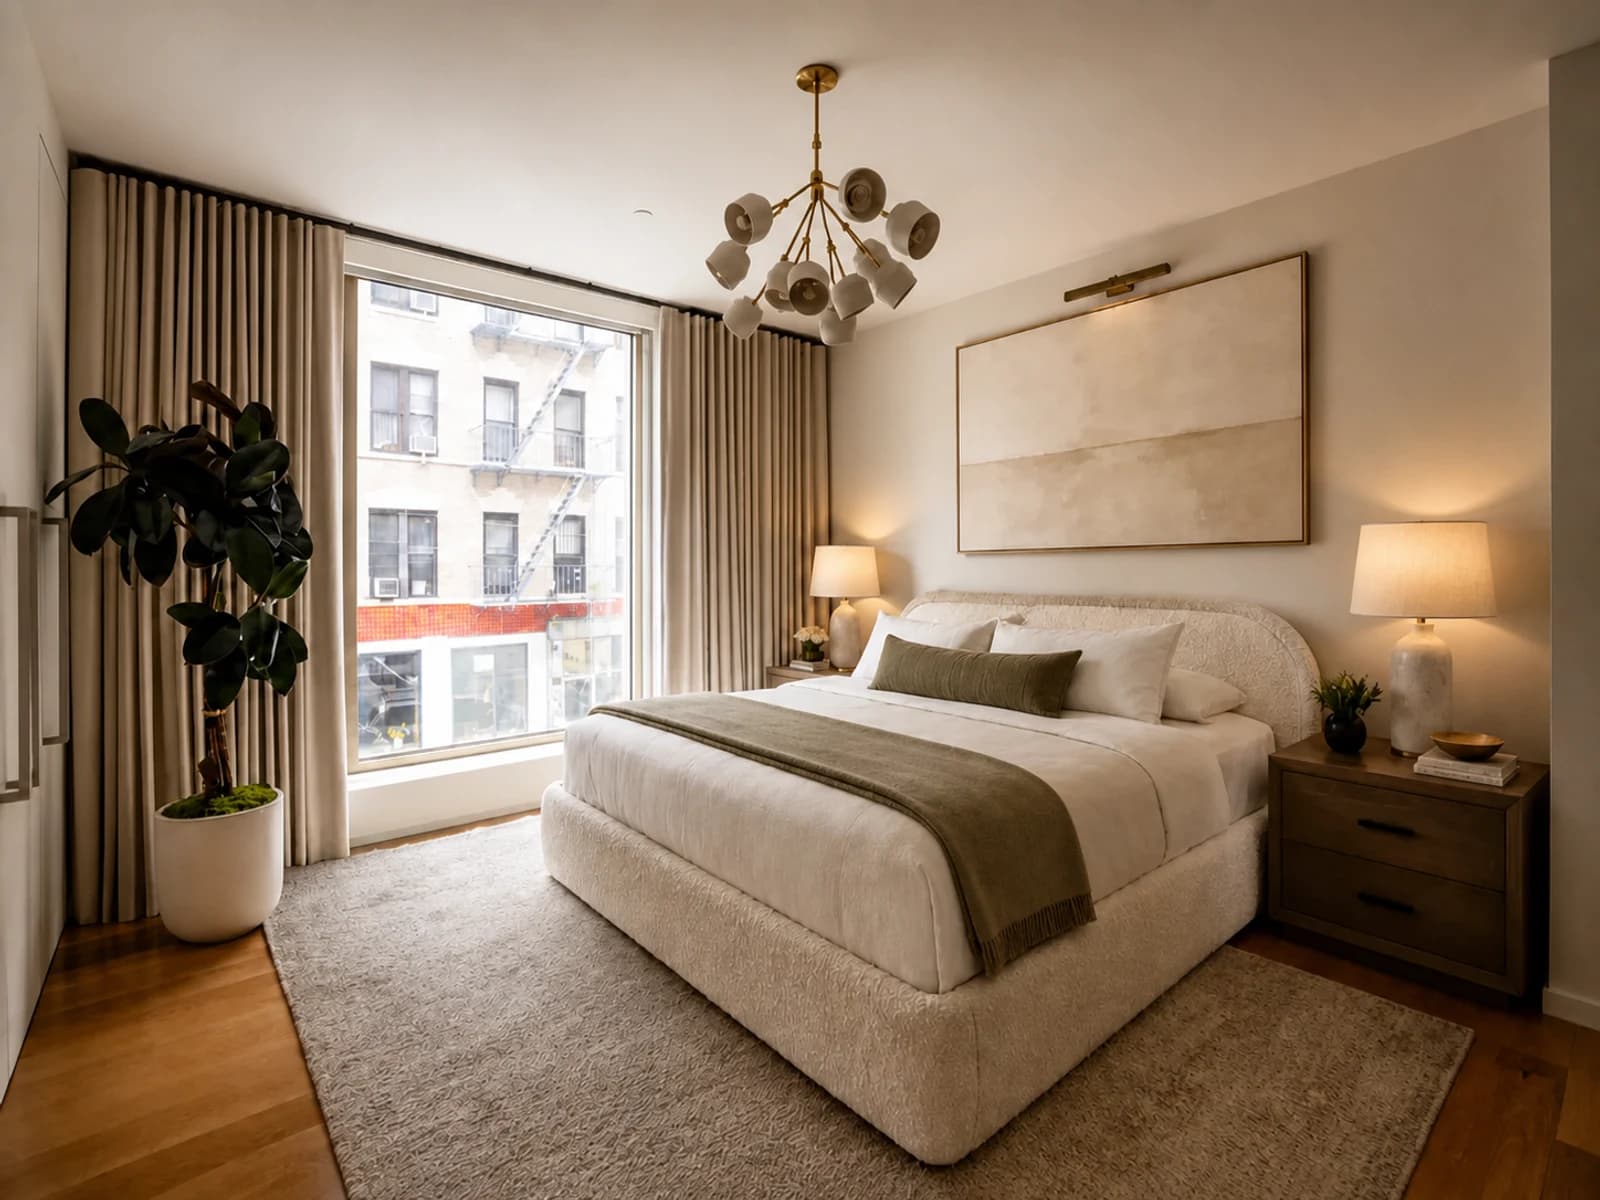
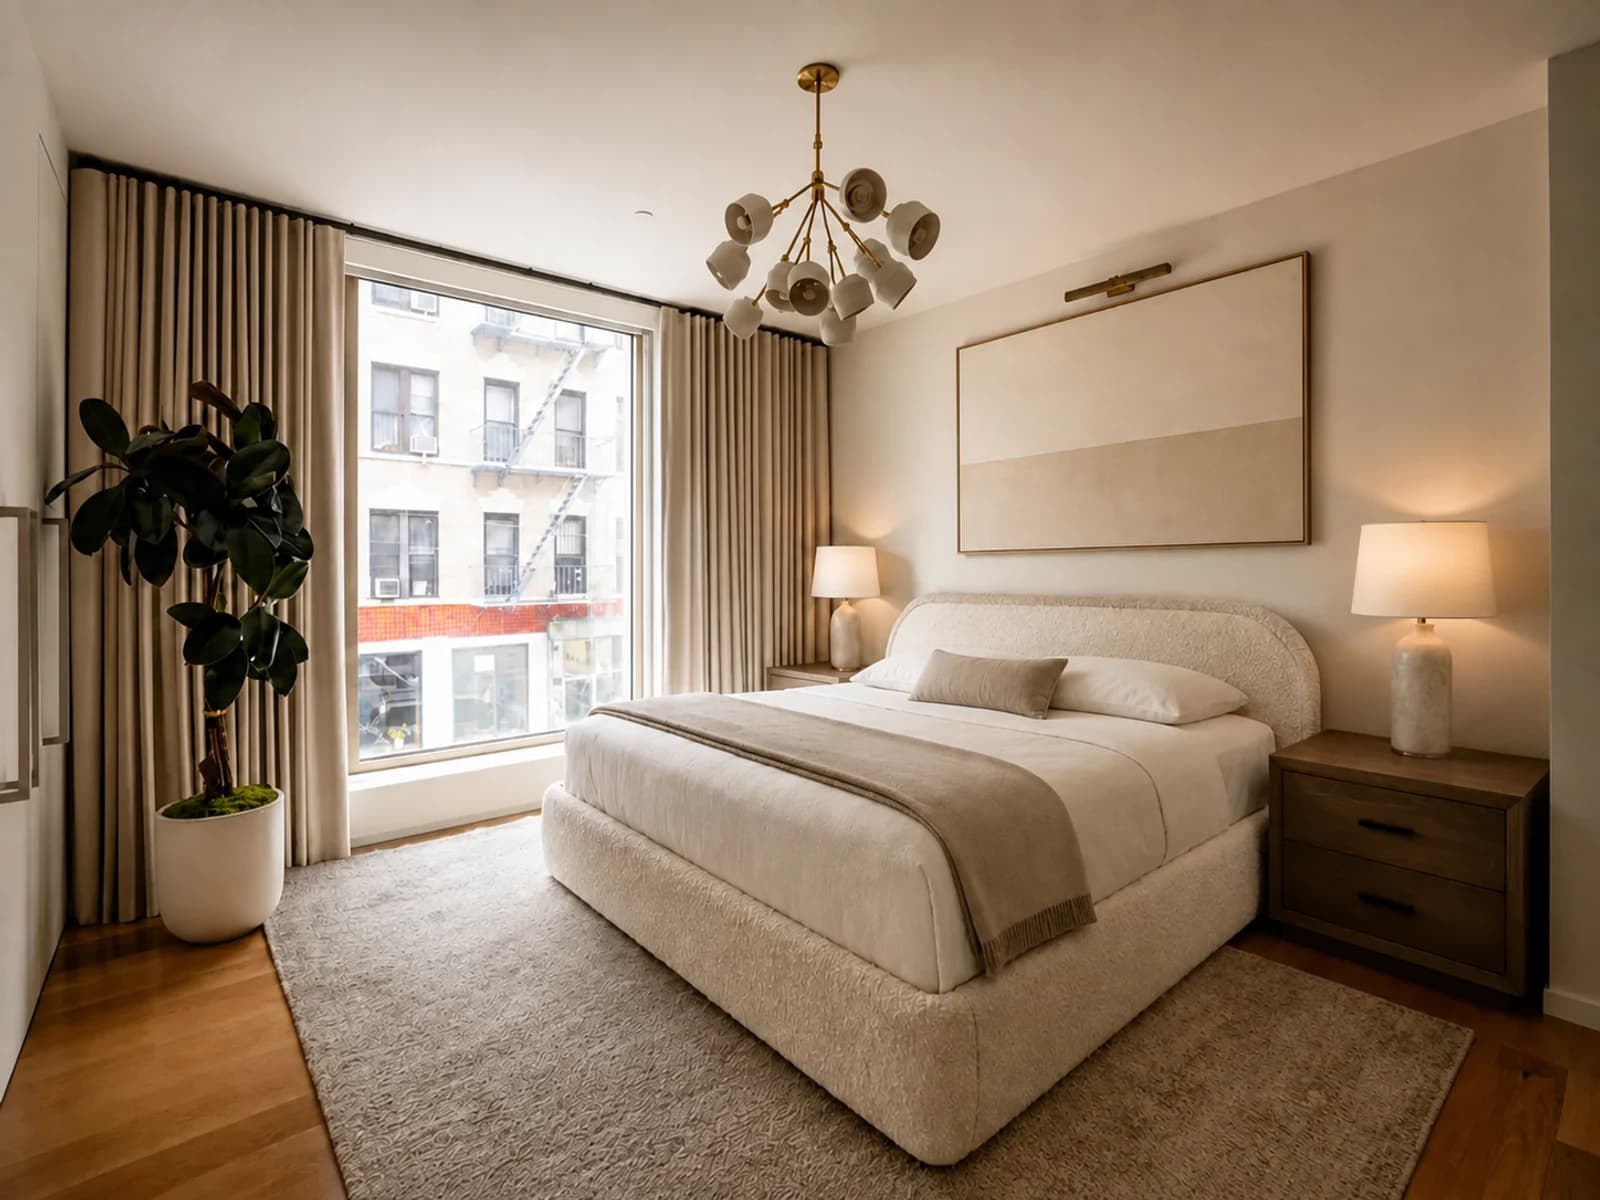
These two refinements are editorial illustrations created outside Room Foundry from the verified baseline preview. They demonstrate the decision method; they are not Room Foundry results or installed rooms. Both preserve the bed and room anchors while isolating a smaller design question.
Step 7: Turn the Preferred Version Into a Bedroom Plan
- Write down what you are keeping, changing, and postponing.
- Measure the room, bed, wall spans, walking paths, windows, doors, outlets, and retained furniture.
- Translate generated objects into categories and specifications rather than assumed product names.
- Set maximum dimensions and a real budget before opening retailer tabs.
- Compare current materials, finish samples, delivery requirements, anchoring instructions, and return policies.
- Test lower-commitment layers such as bedding, paint samples, lamps, and curtains before buying large furniture.
- Ask a qualified professional to review structural, electrical, mounting, code, or construction work.
Generated furniture may resemble a category without corresponding to an exact product. If you add a dresser, the U.S. Consumer Product Safety Commission advises anchoring furniture to help prevent tip-over; follow current product instructions and account for the actual wall condition. A convincing preview never overrides measurements, safety guidance, installation requirements, or professional judgment.
Common AI Bedroom Design Mistakes
- Starting with a cropped bed photo that hides the room shell.
- Naming five styles without describing the visible priorities.
- Saying keep the bed without defining which bed details must remain.
- Judging decor before checking architecture, openings, and circulation.
- Changing too many categories in one refinement.
- Shopping from the image before measuring the real bedroom.
- Treating generated objects as identified, available products.
Final Thoughts
A useful AI bedroom design workflow is disciplined. Begin with a clear photo, make the bed and fixed architecture explicit, choose one coherent style, and give the prompt a hierarchy. Audit preservation first, then refine one decision at a time. The strongest version becomes a visual brief—not a promise that every depicted item fits, exists, or can be installed.
When you carry the preview into the real room, measure everything that affects fit, verify current products and materials, follow safety and installation guidance, and involve qualified professionals where the scope demands it. That keeps the image useful and the bedroom yours.
FAQ
Common questions
- Can AI design a bedroom from one photo?
- Yes. A photo-first tool can create a visual bedroom concept from one clear image. The result is useful for exploring style, bedding, rugs, curtains, lighting, art, and furniture direction, but it is not a measured plan or construction document.
- How do I tell AI to keep my bed?
- State that the exact bed frame, headboard, size, position, and orientation must remain unchanged, then describe which surrounding elements may change. Compare the generated bed carefully with the source photo because a prompt improves preservation but does not guarantee it.
- What should I include in an AI bedroom design prompt?
- Include the room goal, one primary style, the items that must stay, the elements allowed to change, two or three visual priorities, and a short avoid list. Keep the hierarchy clear instead of stacking many style labels.
- Should I refine the first AI bedroom design?
- Refine it when the room is recognizable and the main direction is promising. Change one high-impact issue at a time, such as bedding color, clutter, curtains, or lighting, so each version is easy to compare.
- Can I buy the exact furniture shown in the preview?
- Treat generated furniture as a category reference unless a separately verified current product is linked. Measure the real room and confirm product dimensions, materials, color, availability, delivery, anchoring, and return terms before buying.
Keep exploring
Related reading
Bedroom Ideas
Moody Bedroom Ideas That Feel Rich, Not Dark and Heavy
Bedroom Ideas
Warm Modern Bedroom Ideas That Feel Elevated, Not Beige
Bedroom Ideas
How to Redesign a Bedroom Without Replacing the Bed
AI Room Design
AI Interior Design From a Photo: How It Works and What to Expect
AI Room Design
How to Take the Best Photo for an AI Room Redesign
AI Room Design
Can AI Redesign a Room While Keeping Your Existing Furniture?
Interior Design Styles
Japandi Style: How to Create a Calm, Minimal, and Warm Home
Try Room Foundry
See a new direction in your bedroom.
Upload a bedroom photo, choose a style, and create your first preview free. No credit card is required.
Preview your bedroom free