How to Take the Best Photo for an AI Room Redesign
Take a clearer room photo for AI design with practical guidance on camera height, lens choice, lighting, framing, clutter, and useful second angles.
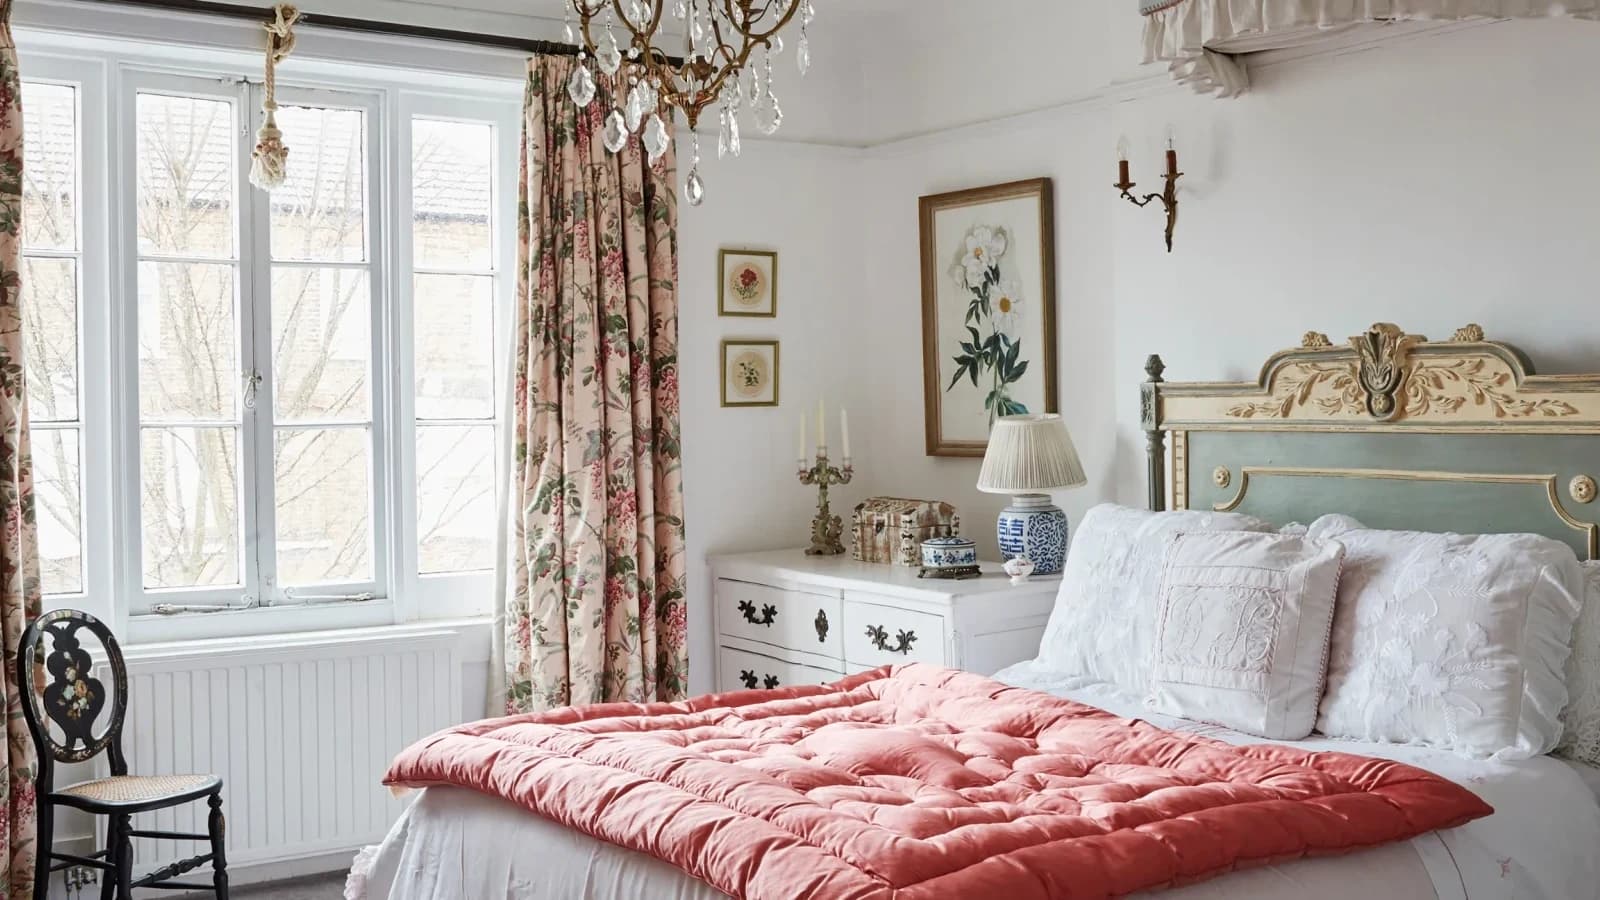
The best photo for an AI room redesign is a clear, level, well-lit landscape image that shows the room’s main furniture, floor, windows, doors, and fixed architecture in one honest view. Stand near a corner or doorway, hold the camera around chest height, start with the normal lens, and leave enough space around the edges. Remove temporary clutter, but keep every piece you want the redesign to recognize.
| Do | Avoid | Why it matters |
|---|---|---|
| Show floor, walls, openings, and major furniture | Tight crop | Provides visible room context |
| Hold the phone level | Point sharply up or down | Reduces leaning verticals |
| Use soft, even light | Dark room with a blown-out window | Keeps both room and structure readable |
| Start with the normal lens | Fisheye, panorama, or extreme ultrawide | Limits edge stretching |
| Remove temporary clutter | Emptying the keep items | Shows the real design problem |
What a useful room photo needs to show
A useful photo does not have to look like a magazine shoot. It needs to describe the space. Include the main furniture, enough floor to understand where pieces sit, the wall-to-ceiling relationship, windows, doors, built-ins, fireplace, and other fixed features. Keep the sofa, bed, rug, flooring, or artwork visible if it must remain.
This guide focuses only on the input photograph. For the full upload-to-decision workflow, read how AI interior design from a photo works.
1. Use a steady, level camera around chest height
Stand near a corner or doorway so the view can include two walls and the floor between them. Hold the phone around chest height as a practical starting point. Keep it parallel to the floor instead of tipping it toward the ceiling or down at the furniture. Door frames and wall corners should look upright rather than converging dramatically.
Turn on the camera grid or level if your phone provides one. Apple’s current iPhone guidance confirms that both tools can help straighten and compose a shot. Brace your elbows, use both hands, and retake the image if motion blur softens furniture edges or trim.
2. Start with the normal lens
Use the main 1× camera when you can step back far enough. An ultrawide lens can include more of a small room, but it often makes nearby objects and outer edges look stretched. If 1× cuts off a critical opening, try moving farther into a doorway before switching lenses. Use ultrawide as a practical fallback, keep important objects away from the extreme edges, and avoid fisheye, panorama, portrait blur, and digital zoom.
3. Balance daylight and room light
Photograph during the day when the room has soft, even light. Open curtains or blinds enough to reveal the room, but avoid aiming directly into harsh sun. Turn on normal room lights if they improve dark corners without creating severe color casts or glare. Tap to focus and expose for the room rather than allowing a bright window to turn everything else into shadow.
4. Frame the full design problem
Use landscape orientation and leave a small margin around the room. Include the base of major furniture, visible floor, wall corners, and openings. Do not crop through the object you want to keep. A close view of a sofa may show its fabric, but it cannot explain its relationship to the rug, windows, doorway, or focal wall.
Good and bad room photos from the same room
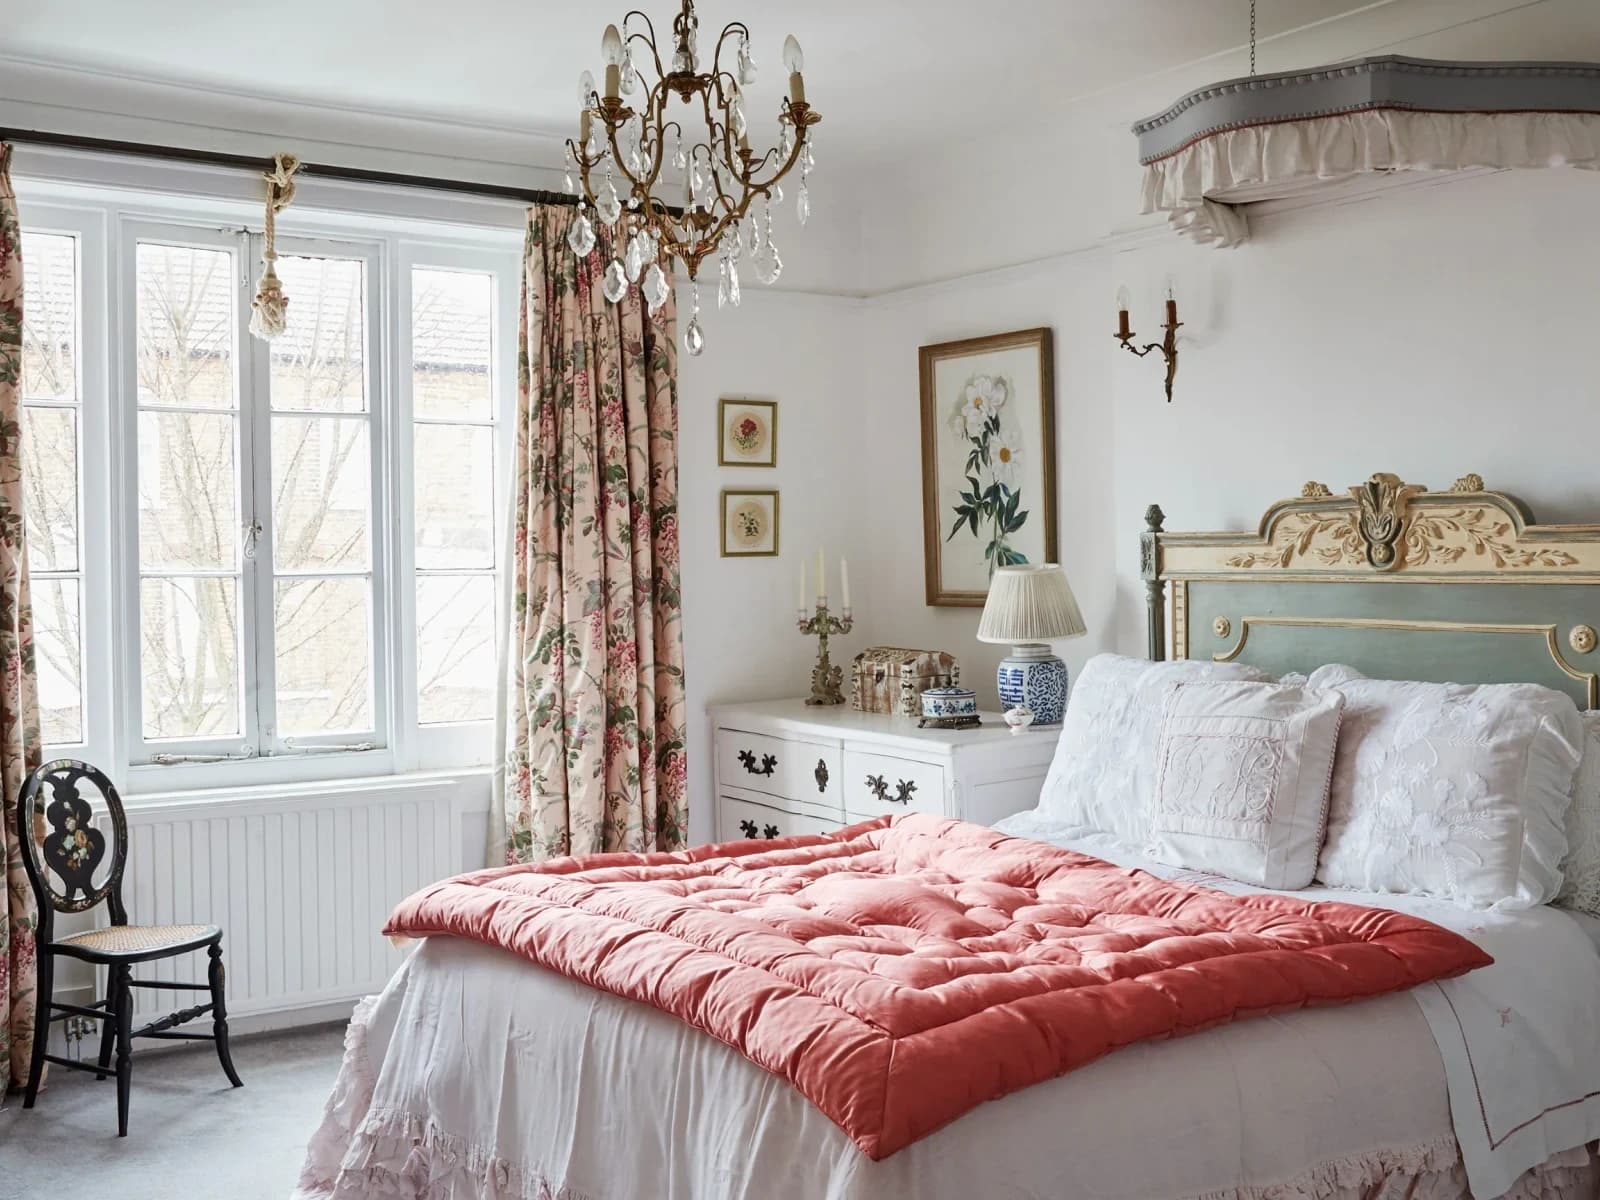
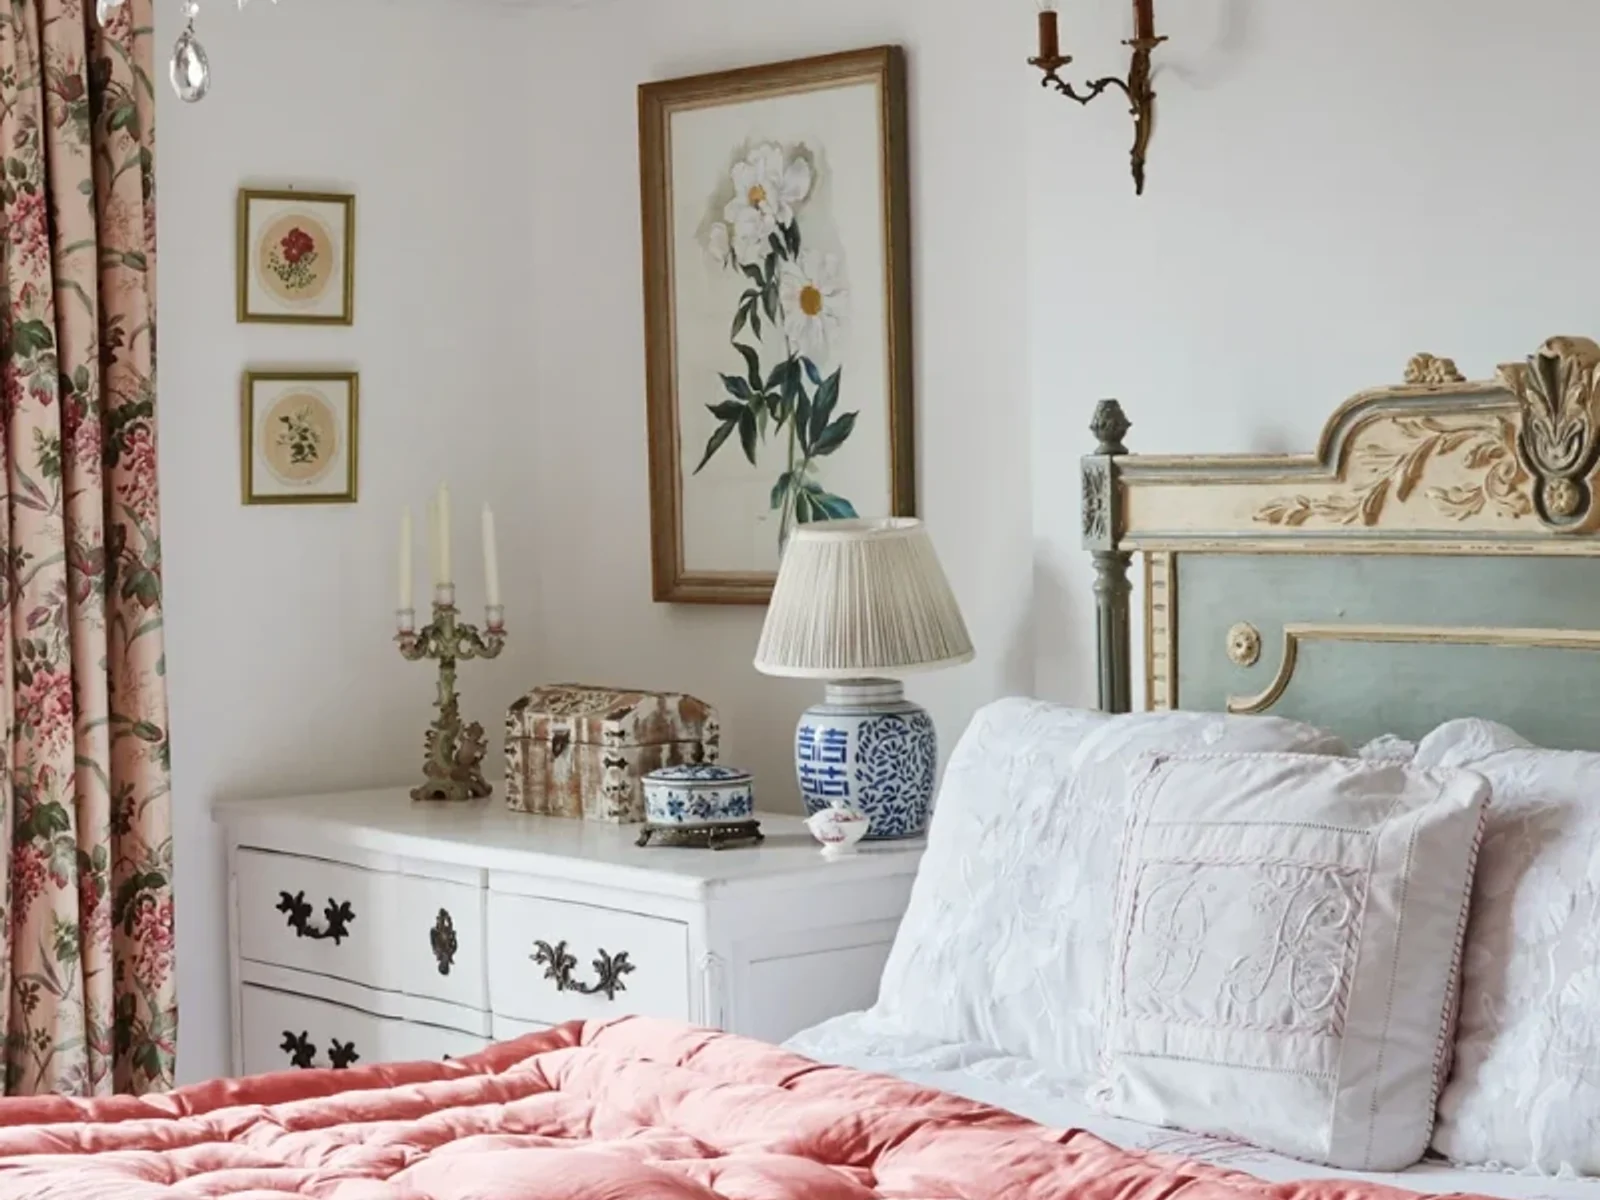
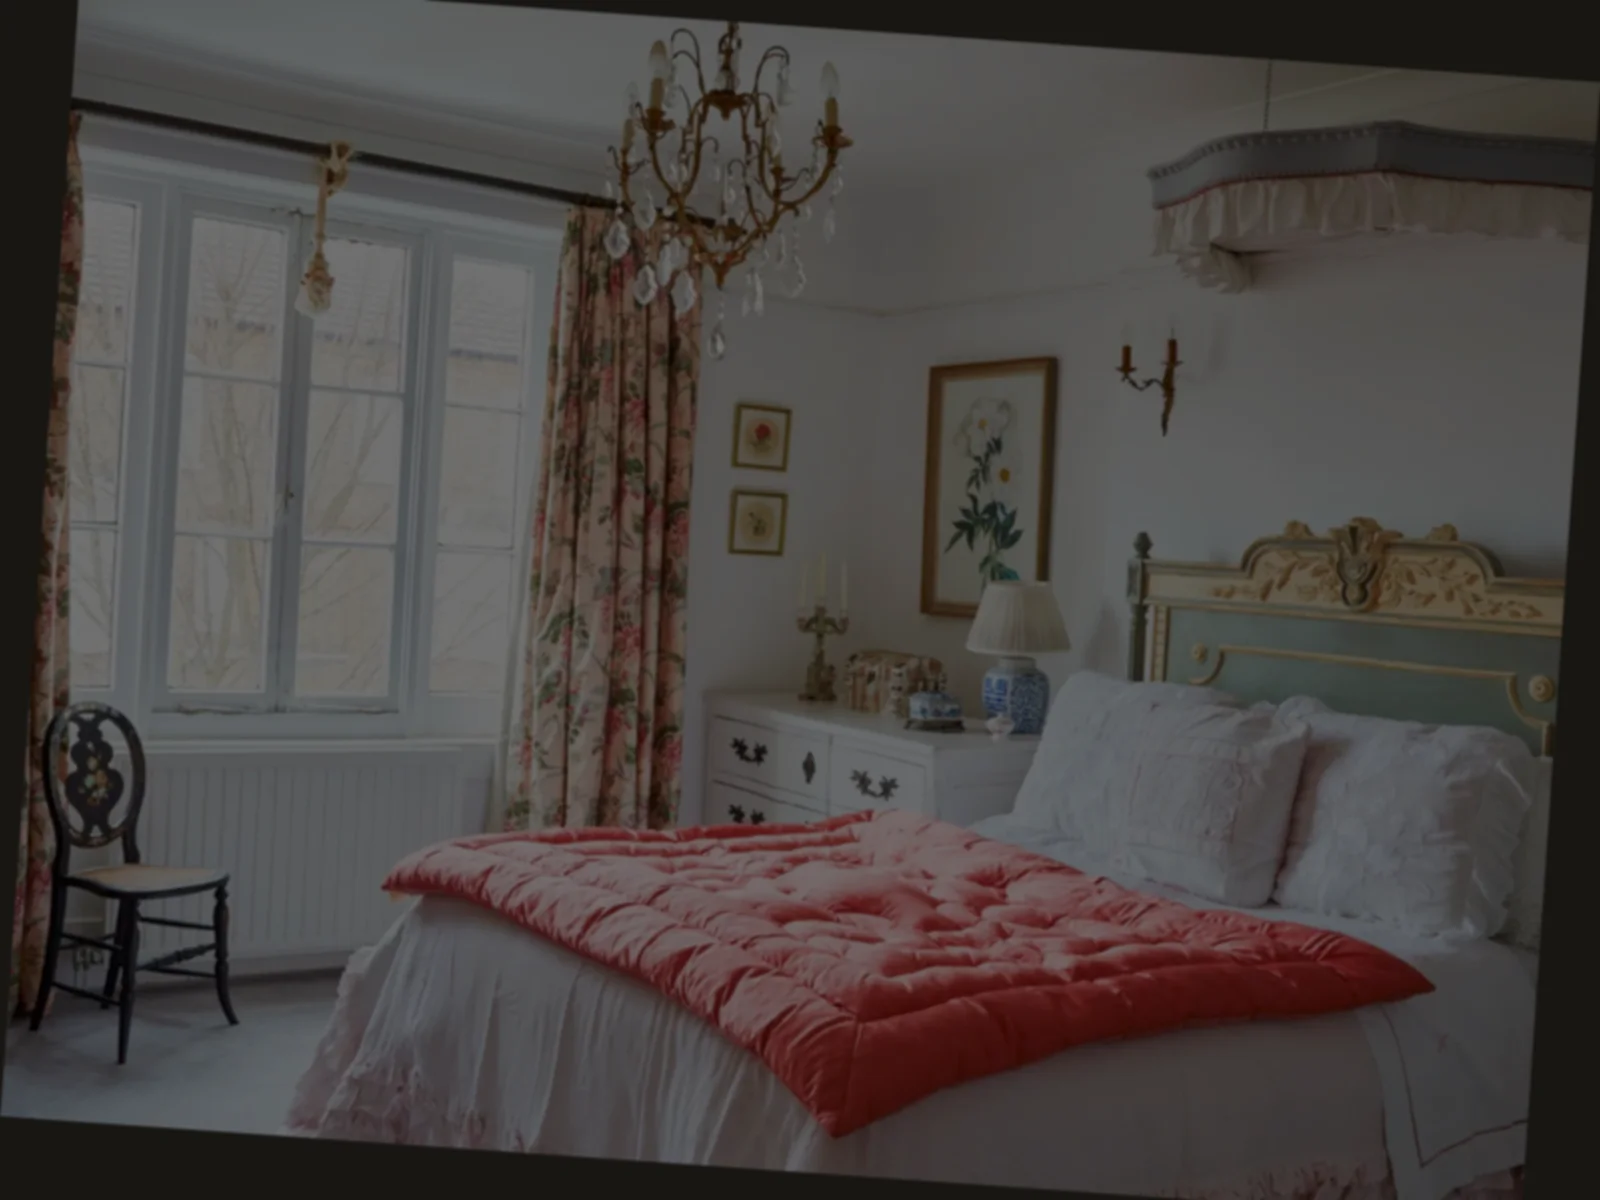
What stayed, what changed, and what to verify
All three examples use the same Room Foundry-owned room photograph. The bed, chandelier, window wall, flooring, furniture, and architecture stay the same. Only crop, exposure, softness, and camera angle treatment change. This isolates the photo-quality issue; it is not a Room Foundry-generated redesign or a completed installation.
The comparison can show which source is easier to interpret, but no photograph confirms room dimensions, clearance, product identity, material, or construction feasibility. Measure and verify those details separately.
5. Remove clutter without erasing the room
Move laundry, packaging, dishes, cables, pet items, and temporary floor clutter if they hide the layout or important surfaces. Straighten bedding and curtains enough to reveal their shape. Leave the furniture, flooring, rug, lighting, and decor that the redesign must keep. Do not replace the real room with an empty staged version that hides the actual constraints.
6. Take a second angle when the first leaves a real question
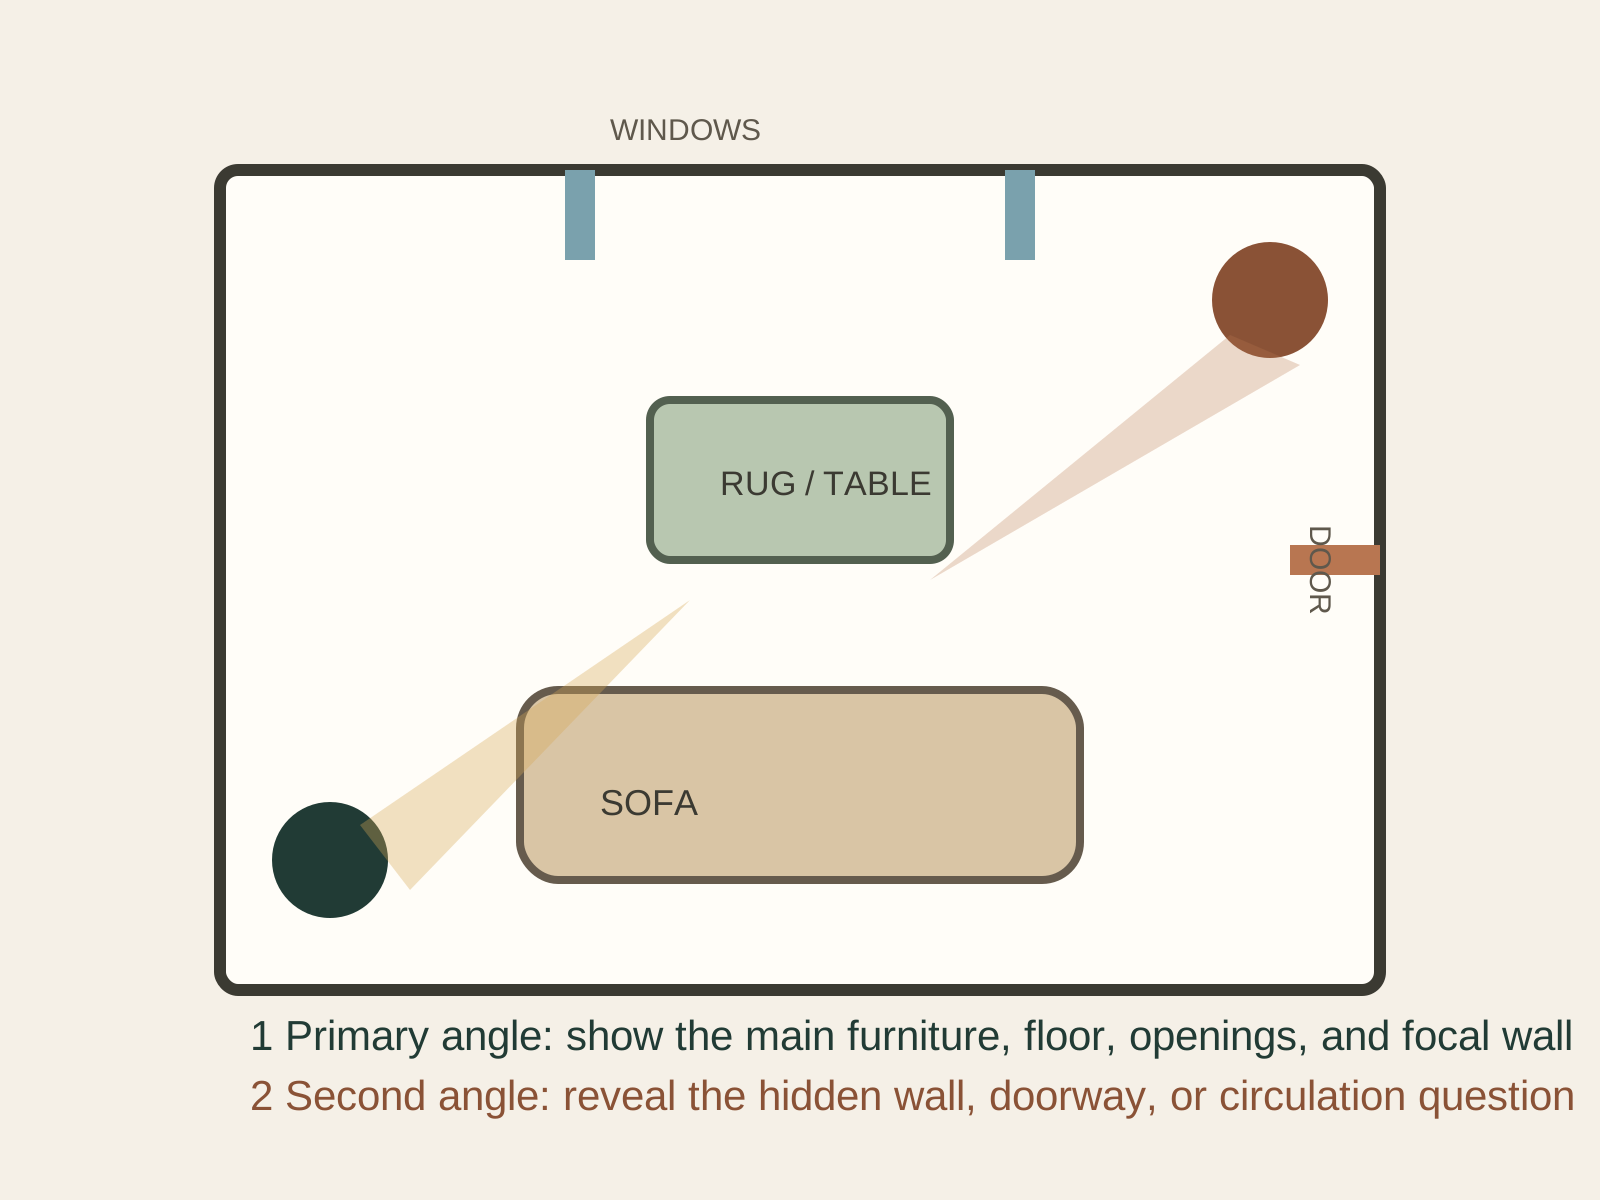
Use one clear broad image as the primary photo. Add a second angle only when it answers something the first view cannot: what is behind the sofa, where a doorway opens, whether a fireplace shares the focal wall, or how traffic crosses the room. Stand in the opposite corner if practical, keep the lens and height similar, and avoid moving important furniture between shots.
A 20-second checklist before you upload
- Wipe the lens and use the rear camera.
- Choose landscape orientation and start at 1×.
- Stand near a corner or doorway at about chest height.
- Keep door frames and wall corners upright.
- Show the floor, windows, doors, fixed features, and major furniture.
- Use even daylight; avoid harsh backlight and deep shadow.
- Remove temporary clutter but leave every keep item visible.
- Check focus, motion blur, glare, and accidental crop.
- Take a second angle only when it resolves a hidden part of the room.
Once the photo is clear, move to the room-specific workflow: AI bedroom design from a photo or the step-by-step guide to AI living room design from a photo.
For a sofa-led space, use the AI living room design from a photo guide to define the keep list, layout question, and refinement order after upload.
Frequently Asked Questions
A better photo creates a clearer starting point
The goal is not photographic perfection. It is a readable record of the room you actually have. Keep the phone level, use a natural lens, balance the light, show the architecture and important furniture, and take a second angle only when it adds missing context. That gives the redesign a stronger visual starting point while keeping real-world verification separate.
FAQ
Common questions
- What is the best camera height for an AI room photo?
- Start around chest height and keep the phone level. The exact height matters less than showing useful floor, walls, openings, and furniture without tilting sharply up or down.
- Should I use the wide-angle lens for a small room?
- Use the normal camera when you can step back enough. Use ultrawide only when space makes it necessary, because edges and foreground objects can look stretched. Never use panorama or fisheye modes for the primary image.
- Should I clean the room before taking the photo?
- Remove temporary clutter that blocks the floor, furniture, or architecture, but leave the pieces you want the redesign to keep. The photo should document the real design problem rather than an artificially empty room.
- When should I take a second room photo?
- Take a second angle when the first hides a doorway, window, fireplace, major wall, circulation path, or important keep item. Use the clearest broad view as the primary image and the second as reference.
- Can a good photo make an AI room design dimensionally accurate?
- No. A clear photo improves visible context, but it does not provide a complete measured survey. Verify dimensions, fit, products, materials, safety, and construction in the real room.
Keep exploring
Related reading
AI Room Design
AI Interior Design vs. an Interior Designer: Which One Do You Need?
AI Room Design
AI Interior Design From a Photo: How It Works and What to Expect
AI Room Design
How Accurate Is AI Interior Design? What to Trust and What to Verify
AI Room Design
30 AI Room Design Prompts for More Realistic, Useful Results
AI Room Design
Can AI Redesign a Room While Keeping Your Existing Furniture?
AI Room Design
AI Bedroom Design From a Photo: A Practical Step-by-Step Guide
AI Room Design
AI Living Room Design From a Photo: A Practical Step-by-Step Guide
AI Room Design
How to Identify Your Interior Design Style From a Photo
Try Room Foundry
Start with one clear photo of your actual room.
Upload the view that shows your room’s structure and the pieces that matter, then preview a new direction free.
Upload a photo and preview free